SKIRMISH: REVERSE OSMOSIS COMPRESSION NUT
I hate these things, and I struggle to get them to work properly. That bronze thing sticking out of the end always seems to cause problems.
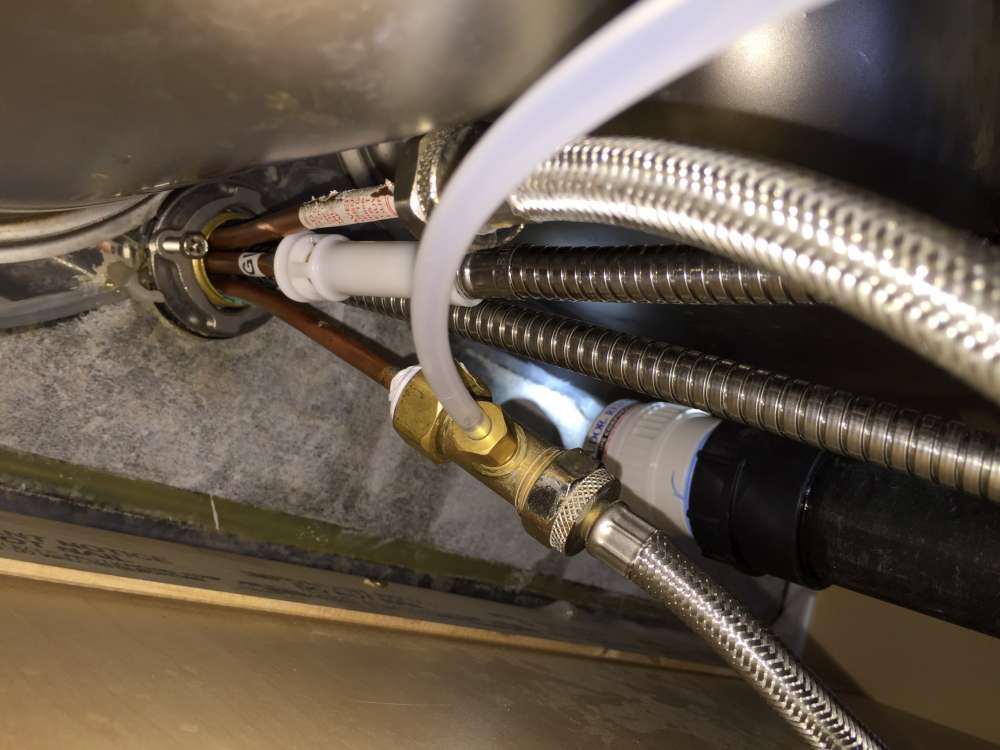
Last night the RO system started spraying water everywhere. I suspect the plumber who came to look at the garbage disposal accidentally pulled it loose. That shouldnt be possible, because RO systems use “compression nut” to lock down the ends of the tubes.
The person who installed the system however did NOT do it correctly. The bronze thing on the end was not there AND they are using a compression fitting for a copper pipe, not plastic tubing.
The problem I have with these, is that I can never get the parts to work together properly. Here is a handy video on how it should be done:
I have found that the bronze “tube” provided in kits at lowes/homedespots is too long AND once inserted, increases the diameter of the tubing such that it won’t fit into the sleeve or compression nut.
This time, I asked the guy at Lowe’s to open it up, show me how the pieces all fit together and also did it using their tubing. It all worked together nicely, so I bought the tubing as well. And everything came together very nicely at home.
STEP 1: Turn off Water
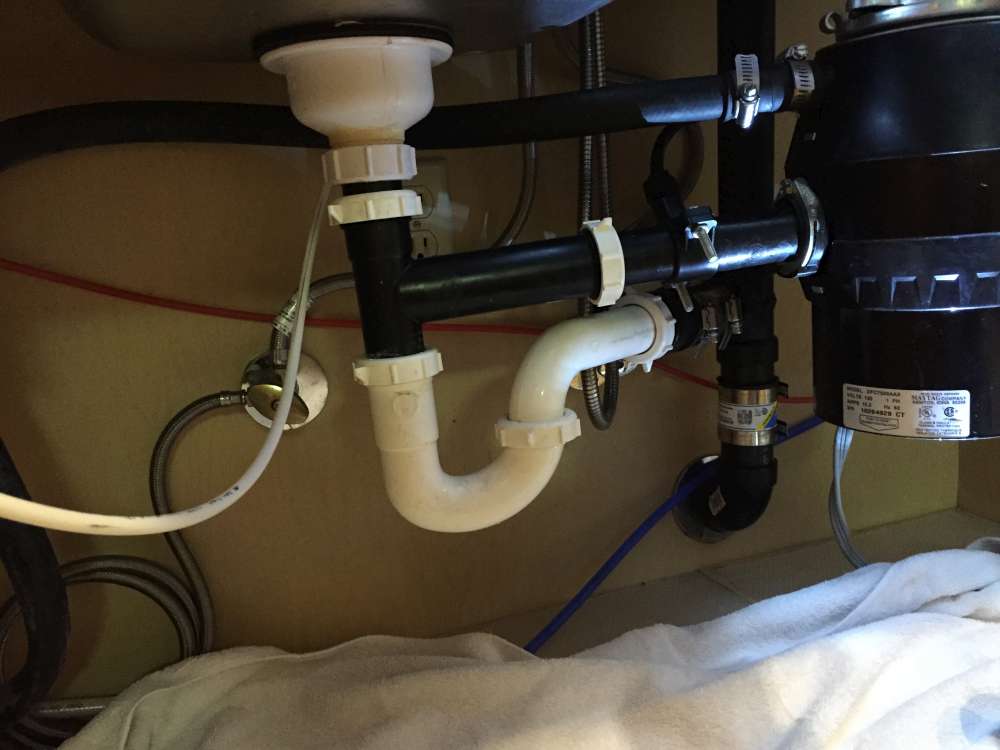 STEP 2: Locate tubing and remove
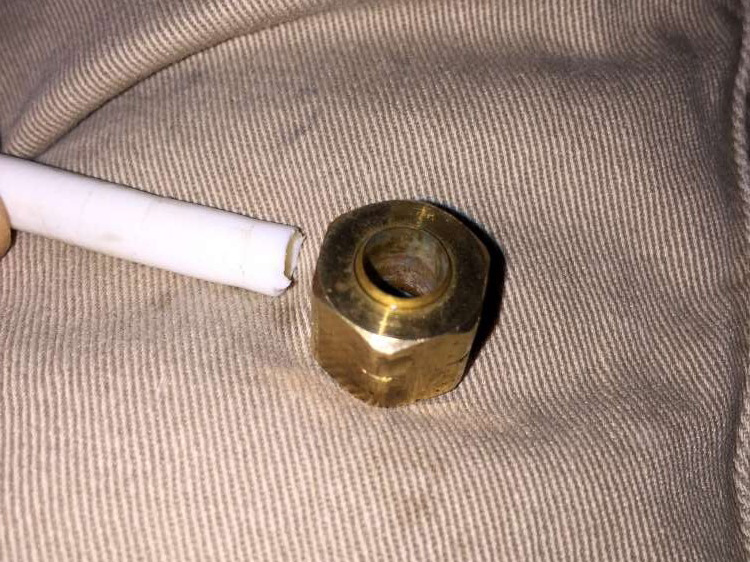
 STEP 3: Discard old tubing and compression nut ( note the built in compression sleeve )
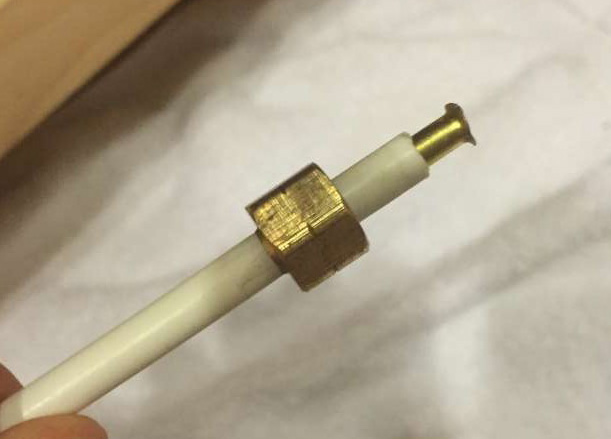
STEP 4: Put tube, plastic sleeve and compression nut on new tubing … in the proper order. ( edges of tube are bent because I mangled it taking it back out / reinserting it )
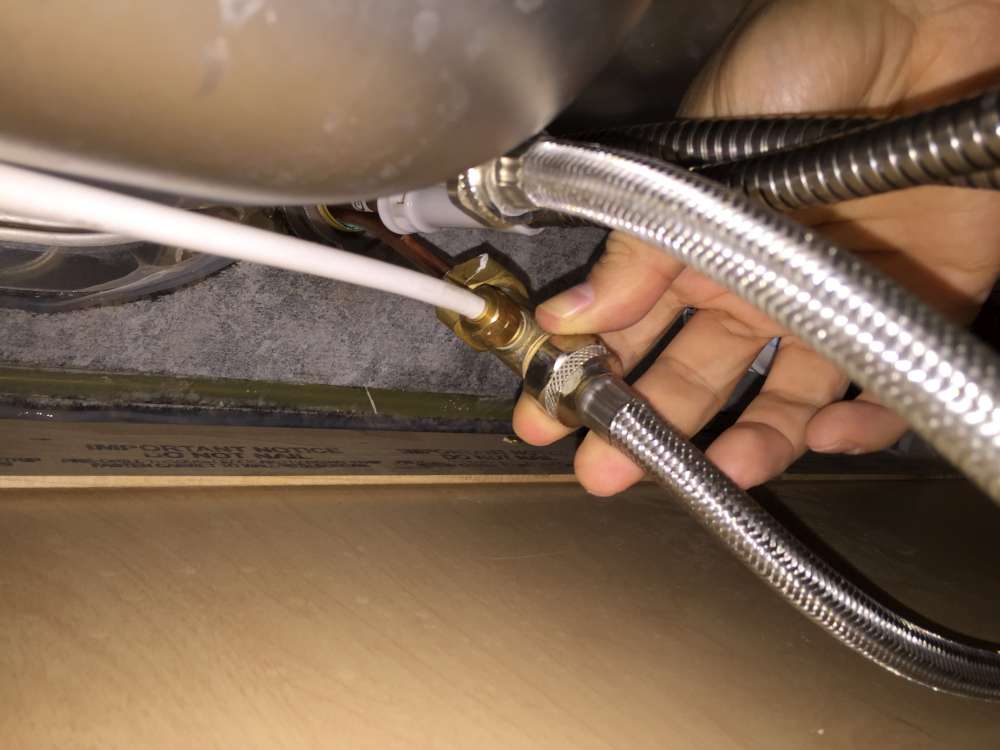
 STEP 5: Screw it back in. ( not shown… cut to size and reattach the other end, turn water back on )
SCORE: Clear Victory. For now. unless it comes out at night and floods the house.
COMING SOON! It is time for the yearly filter / bleach of the RO system.